


The best way to remove tarnish from your silver really depends on the piece you're holding. For a light bit of discolouration, a simple homemade bath with baking soda and aluminium foil often does the trick beautifully. But for a deep, stubborn tarnish, especially on valuable sterling silver, a quality commercial polish is your best bet for bringing back that shine and adding a layer of protection.
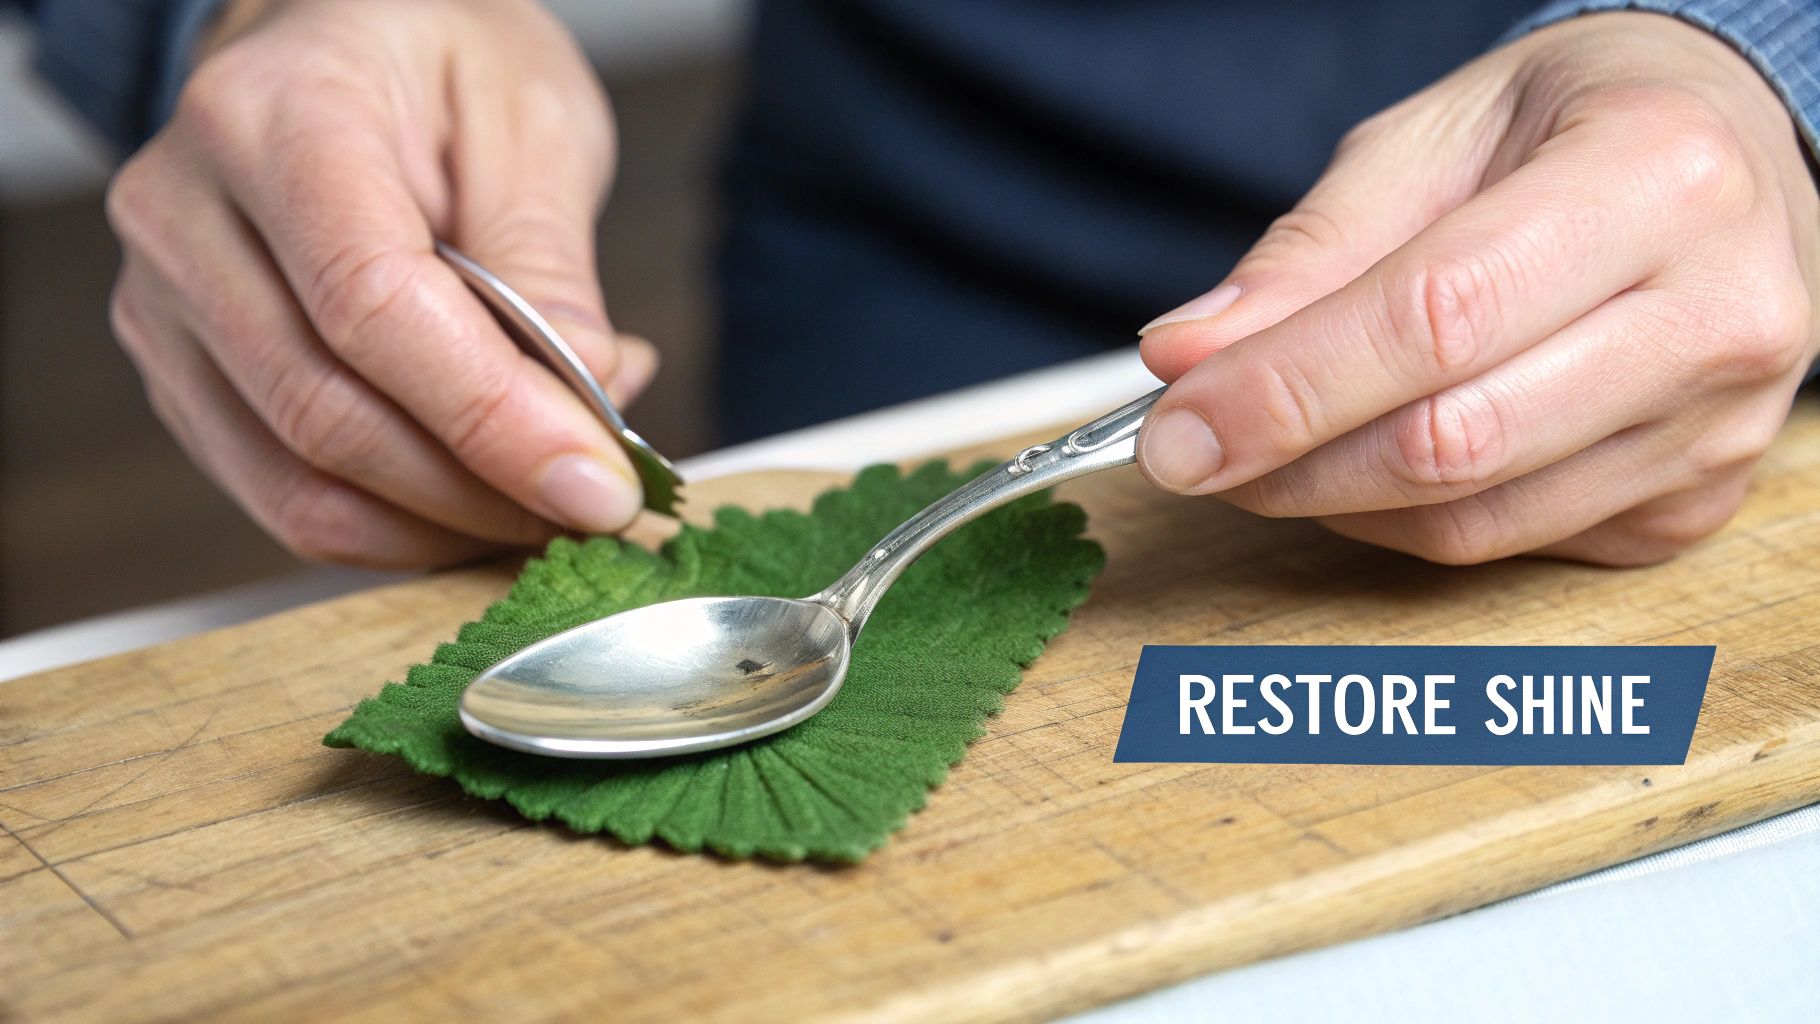
Getting your silver’s sparkle back is thankfully a straightforward job, whether you're working on an heirloom teapot or your everyday cutlery set.
Understanding Your Silver and Its Needs
Every piece of silver has its own history, but tarnish can quickly dull its story, hiding the beautiful details under a dark film. Before you start polishing, it’s important to know what you’re dealing with. Tarnish isn’t just dirt; it’s a chemical reaction. When silver meets sulphur compounds in the air, it creates a layer of silver sulphide—that’s the dark coating you see.
Here, we'll walk through the two best approaches for restoring your silver: a gentle, homemade remedy and the more robust power of a professional polish. Picking the right one is the key to safely reviving your cherished items.
Why Proper Tarnish Removal Matters
Jump in with the wrong technique, and you could do more harm than good. You might end up scratching the surface or, even worse, stripping away a fine layer of silver from plated items. A careful, considered approach protects not just how your silver looks, but its value and integrity for years to come.
The need for good silver care has deep roots, stretching all the way back to the 17th-century Sheffield cutlery boom here in the UK. Today, it’s just as important. With about 60% of silverware being affected by tarnish annually due to airborne hydrogen sulphide, the market for cleaners is growing. In fact, after the pandemic, one survey found that 45% of UK hoteliers boosted their silver maintenance budgets by 18% to keep everything from barware to candelabra gleaming, which directly increased sales of cleaning products. You can dig into the numbers yourself in this gold and silver cleaner market report.
The goal is always to remove the tarnish, not the silver itself. A gentle, methodical approach will ensure your silver remains beautiful for generations to come, preserving both its material and sentimental value.
Key Factors to Consider
Before you grab any polish, take a quick moment to properly look at your item. Thinking about these points will help you make the right choice:
- Material: Is it solid sterling silver (usually marked '925') or silver plate? Plated pieces need a much gentler hand, as the silver layer is very thin.
- Severity of Tarnish: Are you dealing with a faint, yellowish film or a heavy, black coating? The darker the tarnish, the more intensive the method you’ll need.
- Item Complexity: Does the piece have lots of intricate patterns, engravings, or areas that are meant to be dark? Aggressive cleaning can easily ruin these delicate features.
- Composite Materials: Look for any non-silver parts like wooden handles, ivory inlays, or gemstones. These will need to be protected during the cleaning process, as they can be damaged by polishes and cleaning solutions.
A quick assessment of these factors will help you confidently choose a method that restores that beautiful lustre without causing any damage.
Quick Guide to Silver Tarnish Removal
To make things a bit easier, this table breaks down the best approach for different situations. Use it as a quick reference to find the right tarnish removal method for your specific needs.
| Method | Best For | Key Benefit | Level of Effort |
|---|---|---|---|
| Baking Soda & Foil Bath | Lightly tarnished sterling silver, cutlery | Gentle, chemical-free, great for large batches | Low |
| Commercial Polish (Cream/Paste) | Heavily tarnished items, detailed pieces | Deep cleans, protects, restores high shine | Medium |
| Polishing Cloth | Regular maintenance, very light tarnish | Quick, easy, and adds a protective barrier | Very Low |
| Professional Cleaning | Antique, valuable, or composite items | Safest option for irreplaceable pieces | N/A |
By matching the method to the item, you’ll ensure your silver stays in beautiful condition, ready for the next dinner party or family gathering.
Choosing Your Method: Home Remedies vs Commercial Polishes
Getting the tarnish off your silver is one thing; doing it the right way is another entirely. This is the most important decision you'll make in the process, and it really comes down to a choice between a gentle, home-spun remedy and the targeted power of a proper commercial polish. Each has its time and place, and the right one depends entirely on the piece you're holding.
Think of it this way: for a full canteen of silver-plated cutlery with just a light, yellowish tinge, a home remedy is perfect. But for a heavily blackened sterling silver candlestick that’s been in the family for generations? That calls for the reliability and restorative qualities of a specialised polish.
Making the right choice isn't just about restoring shine—it's about protecting the integrity and value of your cherished items. And it’s a decision more and more of us are making. In the UK, the market for anti-tarnish agents is growing by 6.6% annually, which tells you just how much we still appreciate our fine silverware. British households own an estimated 15-20% more silver tableware per person than the European average. With around 30% of these pieces being over 50 years old, using the correct cleaner can prevent 40% more oxidation, safeguarding these heritage investments for the future. You can dive deeper into these trends in this detailed market report on anti-tarnish agents.
The Gentle Science of Home Remedies
The classic DIY tarnish remover—baking soda, hot water, and aluminium foil—isn't magic. It's a simple bit of chemistry called an ion exchange. Tarnish is just silver sulphide, and it turns out the sulphur atoms in it are more attracted to aluminium than silver. In a hot baking soda solution, the sulphur simply lets go of the silver and bonds with the foil instead, reversing the tarnish without you having to scrub away a single particle of precious metal.
It's a wonderfully gentle method, making it a fantastic choice for:
- Silver-Plated Items: Because there's no abrasion, you don't risk wearing through the thin silver layer.
- Large Batches: You can pop an entire set of cutlery into a large basin and clean it all at once, which is a huge time-saver.
- Light to Moderate Tarnish: It works brilliantly on pieces with that common yellowish or light brown discolouration.
The downside? This method has its limits. It struggles with heavy, black tarnish and offers zero lasting protection against future discolouration.
The Power and Precision of Commercial Polishes
When you need a deeper clean or want to keep that shine for longer, a high-quality commercial silver polish is always the better option. These products are formulated not just to clean, but to care for your silver. They contain incredibly fine, controlled abrasives that gently lift away stubborn tarnish while polishing the surface to a brilliant lustre.
Better yet, many professional polishes—like those we recommend here at Lincoln House Cutlery—also include anti-tarnish agents. These clever ingredients leave an invisible barrier on the surface, slowing down the reaction with airborne sulphur and keeping your pieces gleaming for much longer.
Expert Tip: Always, always use a soft microfibre cloth when applying a commercial polish. An old T-shirt or kitchen roll might seem fine, but they can contain surprisingly abrasive fibres that will leave tiny scratches all over your silver's surface.
A good commercial polish should be your go-to for silver that is:
- Solid Sterling Silver: These robust pieces can handle the gentle polishing needed to remove even the heaviest tarnish.
- Intricately Detailed: A paste or cream lets you get right into the crevices and detailed patterns that a chemical bath might miss.
- Display Pieces: The protective barrier is essential for items like photo frames or candelabra that are always exposed to the air.
Home Remedy vs Commercial Polish Showdown
Still undecided? This head-to-head comparison should help. Just think about the silver you need to clean and see which column fits best.
| Feature | Home Remedy (Baking Soda & Foil) | Commercial Silver Polish |
|---|---|---|
| Best For | Silver plate, lightly tarnished items, cutlery sets | Sterling silver, heavily tarnished pieces, antiques |
| Mechanism | Chemical reaction (ion exchange) | Mild abrasion and chemical cleaning |
| Protection | None | Often includes anti-tarnish agents for lasting shine |
| Effort | Low; mostly passive soaking | Medium; requires manual application and buffing |
| Cost | Very low; uses common household items | Moderate; a specialised product purchase |
| Risk Factor | Low risk for plating, but may affect patina | Low risk if used correctly, but can abrade if overused |
Ultimately, it’s about matching the tool to the task. For the everyday maintenance of your plated cutlery, the home remedy is wonderfully efficient and safe. But for restoring the deep, warm glow of a treasured sterling silver teapot or preserving an antique, a quality commercial polish is an indispensable investment in your silver's future.
A Practical Guide to Removing Tarnish Safely
Right, you’ve decided on your approach, so it’s time to get hands-on. Whether you're reaching for a gentle homemade solution or a purpose-made commercial polish, your technique is what makes all the difference. Get it right, and you'll achieve a brilliant shine without a hint of damage. This is the practical bit, where we turn theory into action and bring every piece, from cutlery to candlesticks, back to its former glory.
Think of this not so much as cleaning, but as a careful restoration. You're gently removing a layer of chemical reaction to reveal the beautiful, bright metal underneath. Rushing the job or using the wrong tools can easily lead to scratches or a patchy finish, which is why a methodical, patient approach always wins the day.
This simple diagram breaks down the core process for any silver cleaning project.
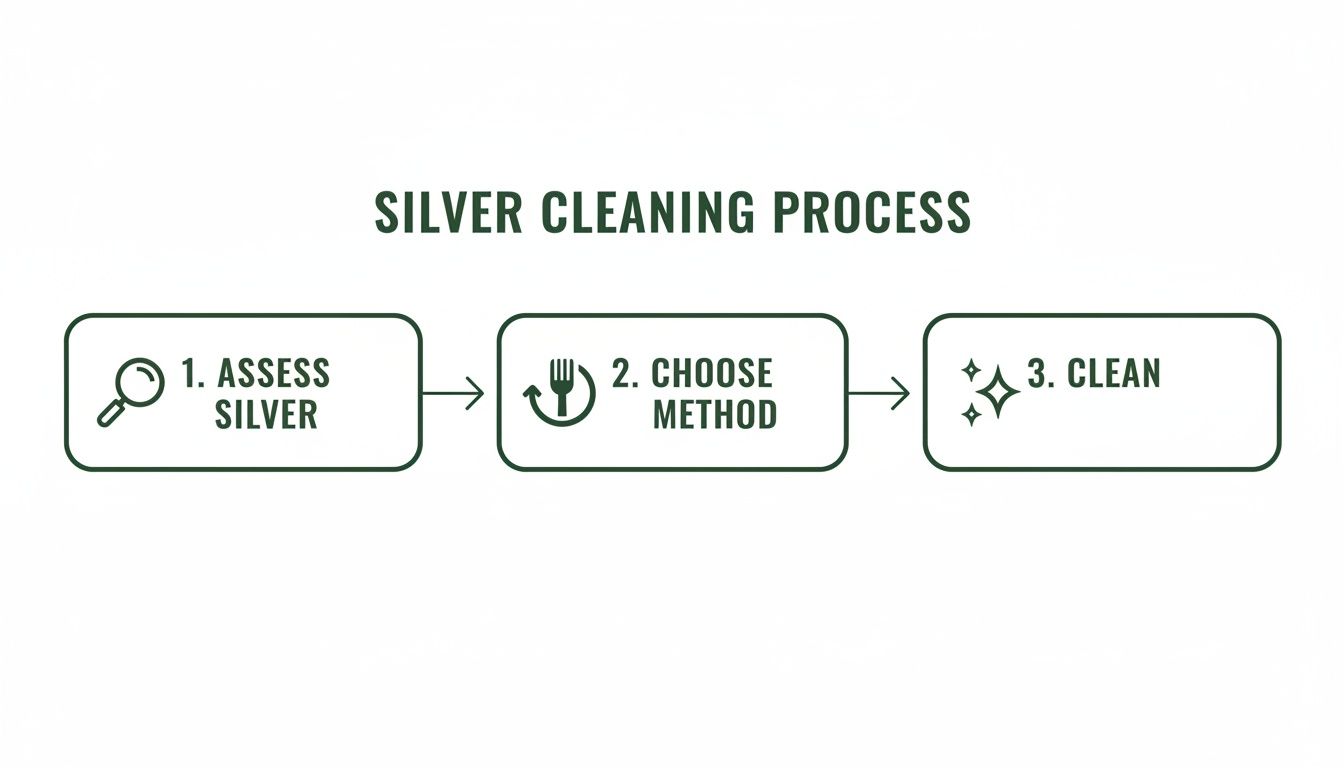
As you can see, a quick assessment of your silver's condition is the crucial first step. It sets you up for a successful and safe restoration before you even get your hands wet.
The Home Remedy Chemical Bath
For lightly tarnished silver plate or a big batch of sterling silver cutlery, the baking soda and aluminium foil method works wonders. It's a neat little chemical reaction that lifts the tarnish away, often without any need for scrubbing.
Here’s exactly what you need to do for the best results:
- Get Your Container Ready: Find a non-metallic bowl or basin big enough to fully submerge your silver pieces without them being crammed in. Line it completely with aluminium foil, making sure the shiny side is facing up.
- Add Your Ingredients: The ratio is simple: one tablespoon of bicarbonate of soda (baking soda) for every litre of water. Just sprinkle it evenly over the foil.
- Heat the Water: Bring your water to a near boil. It needs to be really hot to kickstart the reaction. Carefully pour the hot water into your lined basin and give it a quick stir to dissolve the bicarb.
- Submerge Your Silver: Place your items into the bath, ensuring each piece is touching the aluminium foil somewhere. Don't be alarmed if you notice a faint smell of sulphur (like eggs) – that's just the tarnish leaving the silver, which is exactly what you want!
- Wait and Watch: Let the items soak for 2-5 minutes for light tarnish, or up to 10 minutes if it's more stubborn. You’ll quite literally see the tarnish vanish.
- Rinse and Dry: Using tongs (the water will still be very hot), carefully lift out the silver. Rinse each piece thoroughly under warm running water and, crucially, dry it immediately with a soft, clean microfibre cloth to prevent water spots from forming.
If you’re tackling a larger piece like a teapot or candelabra, you can use your kitchen sink, as long as it isn't metal. Just pop the plug in and line it with foil just as you would a bowl.
Applying Commercial Silver Polish
When you’re dealing with valuable sterling silver or a heavy build-up of tarnish, a high-quality commercial polish is often the better choice. The secret here is the ‘apply, wait, buff’ technique, which gives a deep clean and leaves a protective finish.
Always work in a well-ventilated area when using commercial polishes, as some can have strong fumes. Opening a window or working near an extractor fan is a very sensible precaution.
The process is straightforward but rewards patience:
- Application: Squeeze a small amount of polish onto a clean, soft microfibre or cotton cloth – never apply it directly to the silver. Rub the polish onto the item using gentle, straight back-and-forth motions. Avoid circles, as this can create fine swirl marks.
- Waiting Period: Let the polish dry to a light haze on the surface, which usually takes a minute or two. This is an important step; it gives the active ingredients time to break down the tarnish.
- Buffing: Take a clean section of your cloth and buff away the haze to reveal the shine. Again, stick to straight, even strokes and keep turning the cloth to a clean spot to avoid rubbing dirt back onto the piece.
This method not only produces a fantastic shine but often leaves behind an invisible barrier that helps slow down future tarnishing.
Handling Tricky and Composite Items
Of course, not all silver is created equal. Many beautiful pieces incorporate other materials that need special consideration.
For cutlery with delicate handles made of bone, resin, or wood, you must avoid submerging them. Instead, apply your polish carefully with a cloth or a cotton bud, making sure none of it touches the handle. If you're attempting the foil bath, you'll need to hold the handle out of the water, cleaning only the silver part.
Mixed-metal pieces, like those with gold-gilt details, should never go into a chemical dip or foil bath. These aggressive methods can easily damage or completely strip the gilding. For these treasured items, the only safe option is painstaking, gentle polishing with a high-quality cream polish, applied only to the silver areas. Protecting your investment sometimes means recognising when an item demands a much more delicate touch.
Caring for Antique and Intricately Designed Silver
Not all silver is created equal. While your modern cutlery might be built for the rigours of daily use, antique pieces and those with intricate patterns demand a far more delicate touch. These items aren't just forks and spoons; they're pieces of history, carrying the marks of incredible craftsmanship and generations of family meals. The wrong cleaning method can cause irreversible damage.
The biggest risk with older or highly detailed silver is, quite simply, over-polishing. Each time you use an abrasive polish, you’re not just lifting the tarnish—you’re also removing a microscopic layer of the silver itself. Over many years, this slow erosion can soften fine engravings, wear down crisp maker’s marks, and essentially erase the piece's unique character. For silver plate, the danger is even more acute, as you can easily wear through the thin silver layer right down to the base metal.
Understanding Your Heirloom
Before you even think about reaching for the polish, take a moment to be a detective. Look closely for tiny stamps—hallmarks or maker's marks—often hidden on the back of a handle or the underside of a candlestick. These little marks can tell you everything from the silver's purity (sterling is often marked with '925') to its city of origin and even the year it was made. Knowing what you have is the first crucial step to preserving it.
You should also look for areas that are intentionally darkened. This technique, called oxidisation, is often used by silversmiths to make patterns and details stand out. These dark crevices are a part of the design and should never be polished away.
With antique silver, the goal is preservation, not perfection. A soft, warm patina that tells the story of a piece's age is often far more beautiful than a glaring, brand-new shine. Gentle cleaning that respects this history is always the wisest path.
The Dangers of Chemical Dips
It can be tempting to plunge a heavily tarnished heirloom into a fast-acting chemical dip, but this is often the worst thing you can do. These powerful solutions are indiscriminate; they strip away not only the unwanted tarnish but also any desirable patina and the intentionally oxidised details that give a piece its depth and charm.
Here’s why you must steer clear of them for precious items:
- Composite Materials: Dips can wreak havoc on non-silver parts. They will dry out and crack ivory or bone handles, discolour wooden elements, and can even loosen gemstone settings.
- Gilded Accents: If your silver has gold-washed details (a style known as silver-gilt or vermeil), a chemical dip will simply strip the thin gold layer away completely.
- Porous Surfaces: Many antique pieces, especially those with hollow handles or decorative voids, can trap the chemical solution inside. This lingering liquid can continue to corrode the silver from the inside out, long after you’ve put it away.
A Preservation-Focused Cleaning Method
For most antique and intricately designed silver, a gentle, non-abrasive method is the only safe bet. Interestingly, environmental factors here in the UK can make silver tarnish faster. Research from English Heritage has shown that atmospheric pollutants can speed up corrosion. They also found that light can bleach protective patinas by up to 30%—a key concern for the 18% of UK households displaying antique silver. You can read their fascinating findings on how light affects silver tarnish.
With this in mind, a gentle chemical reaction like the aluminium foil and bicarbonate method is often perfect. It dissolves tarnish in seconds without any rubbing that could harm delicate surfaces.
If you feel manual polishing is necessary, however, choose a high-quality, non-abrasive cream polish. Use it sparingly with a soft cloth or a cotton bud, concentrating only on the raised surfaces and carefully avoiding any decorative details, oxidised hollows, or non-silver materials. Buff very gently with a clean microfibre cloth.
Knowing when to stop is the most important skill. If some tarnish remains in deep crevices after a gentle clean, it’s best to leave it. This is what gives an item its authentic antique character. If a piece is exceptionally valuable, historically important, or damaged, your best course of action is to consult a professional silver conservator. Their expertise is an investment in preserving your family’s history for the next generation.
Keeping Tarnish Away: Long-Term Storage and Maintenance Tips
Getting that brilliant shine back on your silver is a wonderful feeling, but the real art lies in making that lustre last. It’s always better to be proactive with care rather than reactive with cleaning. By adopting a few simple storage and maintenance habits, you can seriously slow down the tarnishing process. That means less time polishing and more time enjoying your beautiful collection.
Your best defence against tarnish starts the second the meal is over. It really all comes down to stopping sulphur and moisture—the main culprits—from getting a foothold on your silver’s surface.

The First Line of Defence: After-Dinner Care
Never let silver cutlery sit with food on it, particularly salty or acidic things like eggs, vinegar, or mayonnaise. These can start to corrode the surface surprisingly quickly.
The ideal routine is straightforward but absolutely essential for preserving your silver. Always hand-wash your pieces soon after use in warm water with a gentle, phosphate-free washing-up liquid. Use a soft cloth or sponge—never anything abrasive—and dry every single piece right away with a soft microfibre cloth. Air-drying is your enemy here; it leaves water spots and mineral deposits that actually encourage tarnish to form.
We cannot stress this enough: never put any silver, sterling or plate, in the dishwasher. The harsh detergents, high heat, and potential jostling against stainless steel can cause pitting, discolouration, and permanent damage.
Smart Storage: The Key to a Lasting Shine
Once every piece is clean and bone dry, where you store your silver becomes the single most important factor in keeping it tarnish-free. The goal is simple: limit its exposure to air and the sulphur compounds floating in it. This is where proper storage solutions really earn their keep.
A purpose-built cutlery canteen or storage chest from a trusted specialist like Lincoln House Cutlery is an investment you won't regret. These aren’t just pretty boxes; they’re typically lined with a specially treated material, often called Pacific cloth. This fabric is impregnated with fine silver particles that act as a sacrificial layer, trapping airborne sulphur before it has a chance to react with your cutlery.
For smaller sets or individual serving pieces, anti-tarnish cutlery rolls give you the same protective qualities in a more compact format. They’re ideal for keeping your most-used items both safe and handy.
Creating a Safe Environment for Your Silver
Beyond specialised storage, you can take a few other simple steps to create a tarnish-hostile environment wherever you keep your silver. Think of it as building a little fortress against the elements.
- Avoid Problem Materials: Some everyday materials actively promote tarnish. Never store silver where it’s touching rubber (including rubber bands), wool, felt, or even certain types of wood and paint which can release sulphur over time.
- Use Anti-Tarnish Strips: If you display silver in a cabinet, popping a few anti-tarnish strips inside can make a world of difference. These small, non-toxic paper strips absorb airborne pollutants, effectively neutralising the threat for several months.
- Control Humidity: Tarnish loves damp conditions. Storing your silver in a dry, low-humidity space is vital. For extra peace of mind, you can tuck a small packet of silica gel inside a storage chest or display cabinet to absorb any excess moisture.
Everyday Habits for Gleaming Silver
The final piece of the puzzle is how you handle your silver day-to-day. Even the natural oils from our skin can leave marks that contribute to discolouration.
For pieces that are handled but not used for eating, like candlesticks or photo frames, a quick wipe with a clean, untreated polishing cloth will remove fingerprints and dust before they become a problem. Interestingly, the more you use your silver cutlery, the brighter it can stay. The gentle friction from use and regular washing acts as a constant, light polish.
By building these simple habits into your routine, you move away from needing a powerful tarnish remover for silver and into a place of simply maintaining an existing brilliance. It’s a small effort that pays off beautifully, ensuring your cherished silverware is always ready for any occasion, gleaming as brightly as the day you got it.
Common Questions About Silver Tarnish Removal
Even with the best care, questions are bound to pop up. Over our decades of experience, we've heard them all, so we've put together some clear, expert answers to the queries we hear most often about using a tarnish remover for silver and general silverware care. Think of it as your go-to guide for those little uncertainties.
We want you to feel completely confident when caring for your cherished tableware, whether it's a modern set you use every day or a precious family heirloom. Let's tackle some of the common questions we hear from customers.
How Often Should I Clean My Silver Cutlery?
The truth is, there isn't a single, one-size-fits-all answer. The ideal cleaning frequency really hinges on two things: how often you use your silver and how you store it.
For cutlery you use daily, a gentle hand-wash immediately after each meal is the most important step. This simple habit is your best defence against buildup. For less-used items, like a formal dining set or serving pieces, a deep clean might only be necessary once or twice a year, provided they are stored correctly. Using an anti-tarnish storage chest or a proper cutlery roll significantly extends the time between polishes.
Your best visual cue is the first sign of discolouration. A faint, yellowish tint is tarnish in its earliest stage; a quick polish at this point is far easier than tackling a heavy, dark layer later on.
Is It Safe to Use Tarnish Remover on Silver Plated Items?
Yes, it is, but you must be exceptionally gentle. The crucial difference is that silver-plated items have a very thin layer of silver bonded over a base metal. Because this layer is finite, aggressive polishing can wear right through it over time, exposing the different coloured metal underneath.
For this reason, always choose the least abrasive method possible for silver plate.
- The baking soda and aluminium foil bath is often the perfect choice, as it removes tarnish via a chemical reaction with practically no rubbing required.
- If you opt for a commercial polish, choose a high-quality, non-abrasive cream designed for plated items.
- Always use a very soft microfibre cloth and apply with light, careful pressure.
Before using any commercial tarnish remover for silver on a plated piece for the first time, always test it on a small, inconspicuous area. This quick check ensures it gives you the beautiful result you're after without causing any harm to the plating.
Can I Put Sterling Silver in the Dishwasher?
Yes. Modern sterling silver and even silver plated cutlery is designed to be dishwasher safe. However, you must still take precautions to avoid the risks of causing permanent damage.
Dishwashers create a harsh, hot, and humid environment that could cause issues with fine metals. The combination of high heat, aggressive detergents (which often contain phosphates and other chemicals), and the potential for direct contact with stainless steel items can cause a host of problems. These include pitting (small, permanent marks on the surface), stubborn black spots, and a permanent dulling of the finish.
Therefore we always suggest the following guidelines to safely clean your silver in the dishwaser:
- Turn the heat down - 50 degrees celsius or lower is recommended to avoid heat damage
- Use a detergent with minimal additives and chemicals - avoid anything with lemon! Dishwasher powders are often better than the tablets as the tablets have additional ingredients to bind them together.
- Lay cutlery flat on a cutlery drawer - keep your silver out of the cutlery basket to avoid cutlery pieces knocking into one another or coming into contact with other metals, such as stainless steel. If you have a cutlery drawer in the top of the dishwasher, lay each piece flat on this.
- Dry immediately after cycle - it may be tempting to put the dishwasher on late at night and empty it in the morning, but this can leave water marks on your silver that are hard to remove. Instead, time your dishwasher cycle so you can remove and dry (with a soft cloth) your silver as soon as it finishes.
The safest and most effective method will always be to wash by hand using a soft cloth and a mild, phosphate-free soap, followed by immediate and thorough drying.
Why Did My Silver Tarnish So Quickly After Cleaning?
It's incredibly frustrating to see tarnish reappear just days after a thorough polish. If this happens to you, the cause is almost certainly environmental. Silver tarnishes by reacting with airborne sulphur compounds, and some homes are simply richer in these culprits than others.
Common sources of accelerated tarnishing include:
- Kitchen Fumes: Cooking with foods like onions, eggs, or cabbage releases sulphur into the air.
- High Humidity: Moisture in the air acts as a catalyst, speeding up the chemical reaction that causes tarnish.
- Contact with Problem Materials: Storing silver near rubber bands, wool, felt, or even some latex paints can cause it to darken rapidly.
If your silver re-tarnishes quickly, take a close look at where it's stored. Moving it to a drier spot away from the kitchen and ensuring it's kept in a protective canteen or anti-tarnish roll can make a remarkable difference.
At Lincoln House Cutlery, we believe that proper care is the key to enjoying your silver for a lifetime. Explore our curated selection of specialist cleaning essentials and anti-tarnish storage solutions to protect your investment.